Colorado: You Can Have a Drought-Resistant, Living Green Lawn

I used to believe that drought-resistant lawns in Colorado are simply impossible. That’s no longer true.
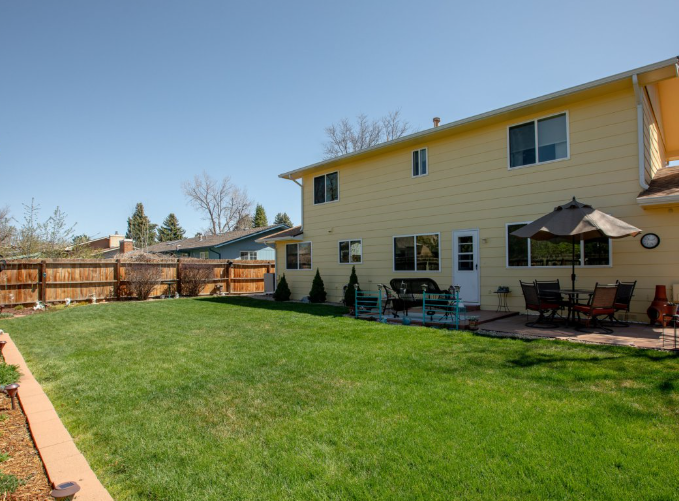
When we bought our house in Longmont Estates, the front and back lawns featured beautiful: lush, deep green, and impeccably manicured Kentucky Bluegrass. Those lawns were also water hogs.
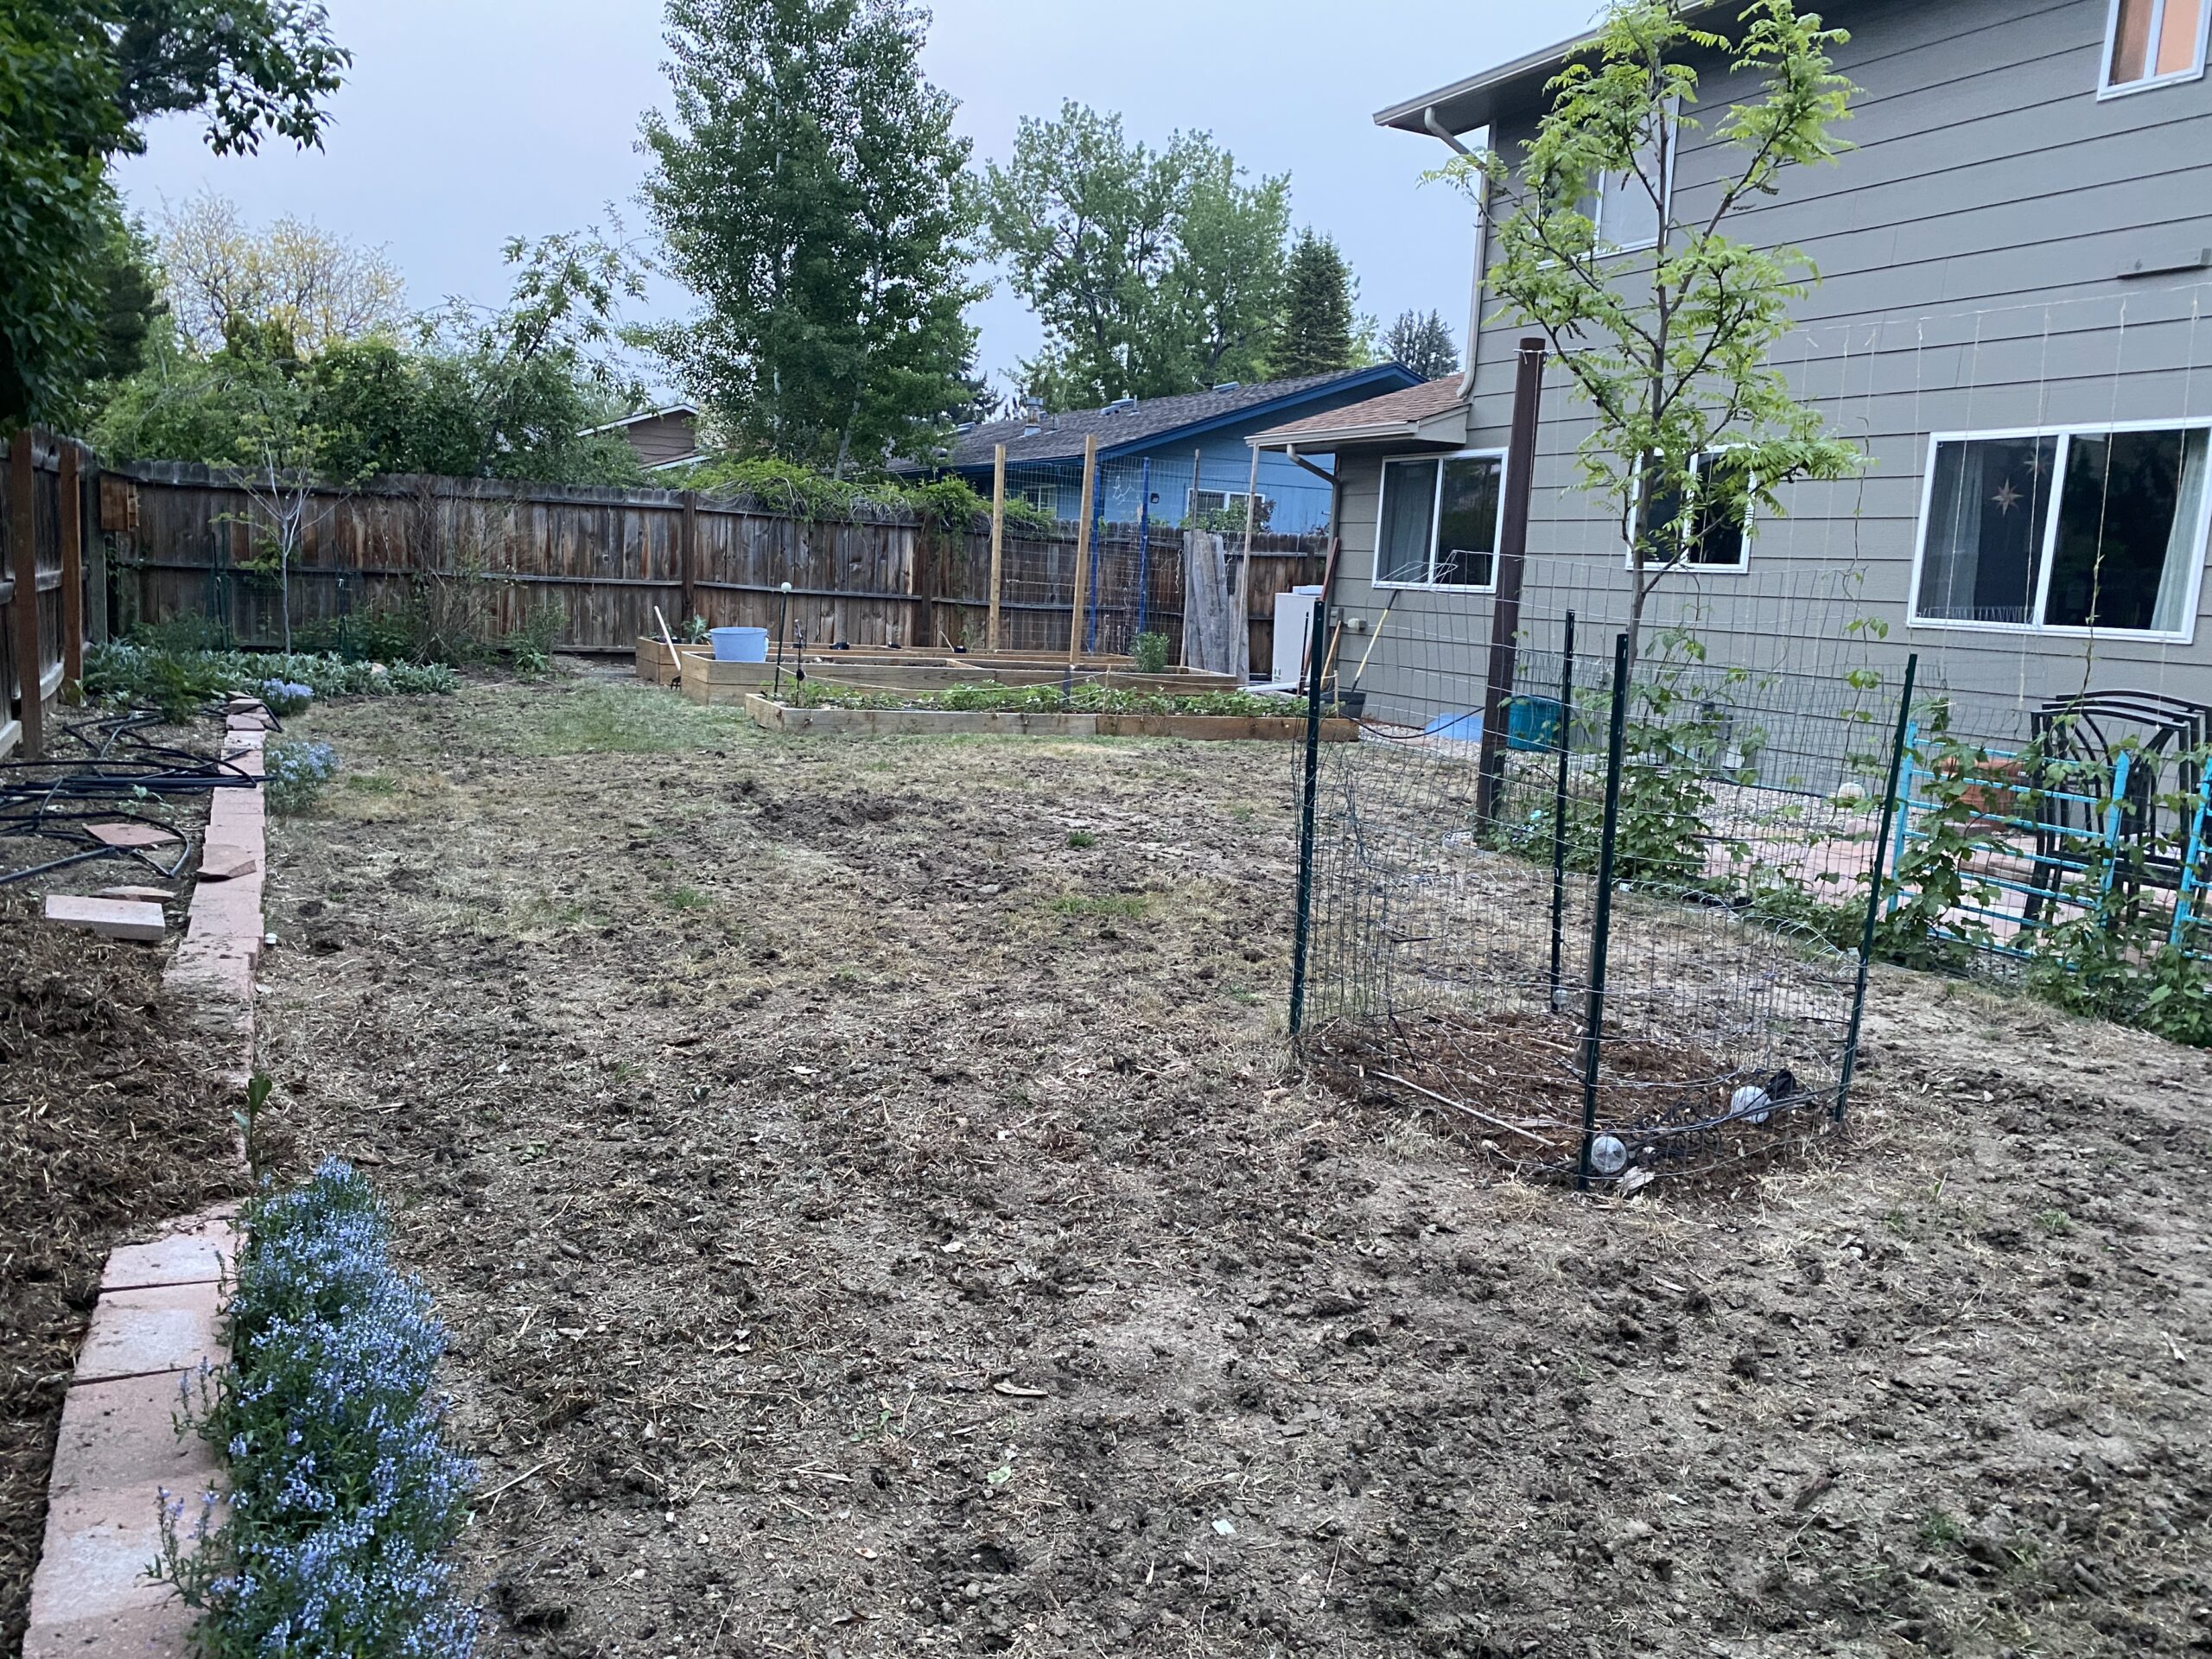
How much water did this luxurious, full-sun, 2,000 sq feet of grass need need? 18,600 gallons a month (in July).* Yes, that’s eighteen thousand six hundred gallons, not a typo. The original backyard (and house paint) can be seen below.
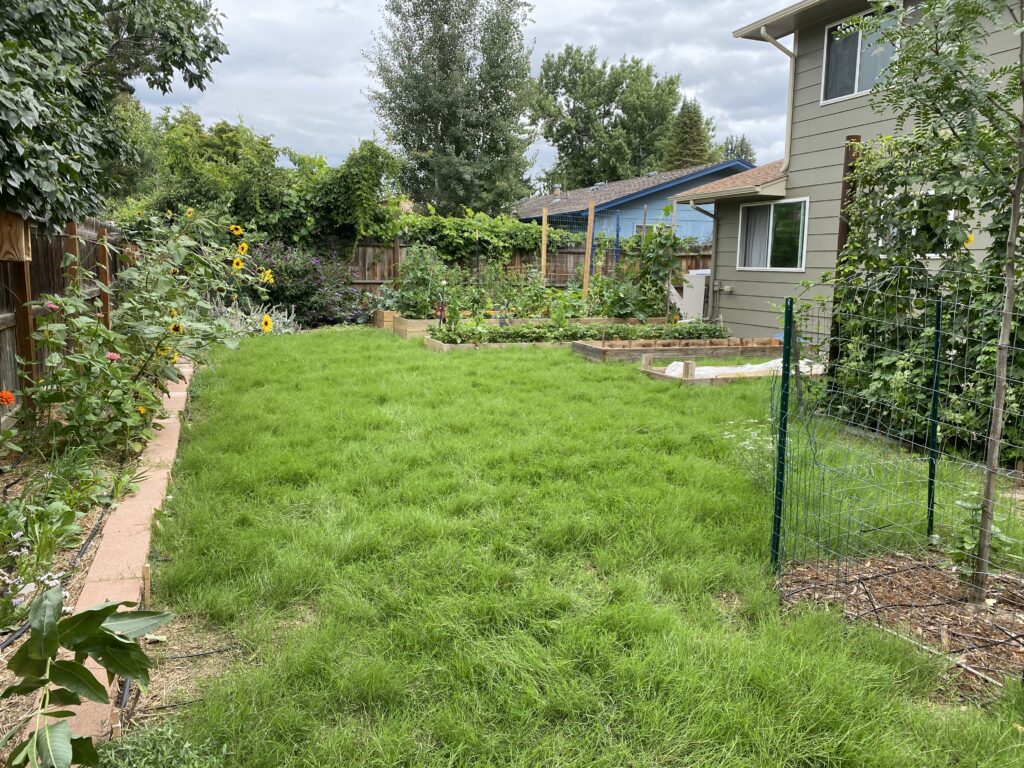
It made our water conservationist hearts wilt to ponder that watering regime, so we began planning what we’d replace it with. We settled on low-water-use pollinator gardens for the front of the home. I built a greenhouse, chicken habitat, and raised bed gardens in the back and kept threatening to kill the remaining lawn and replace it with mulch.
My husband really wanted some lawn in the back yard… I didn’t want to waste water.
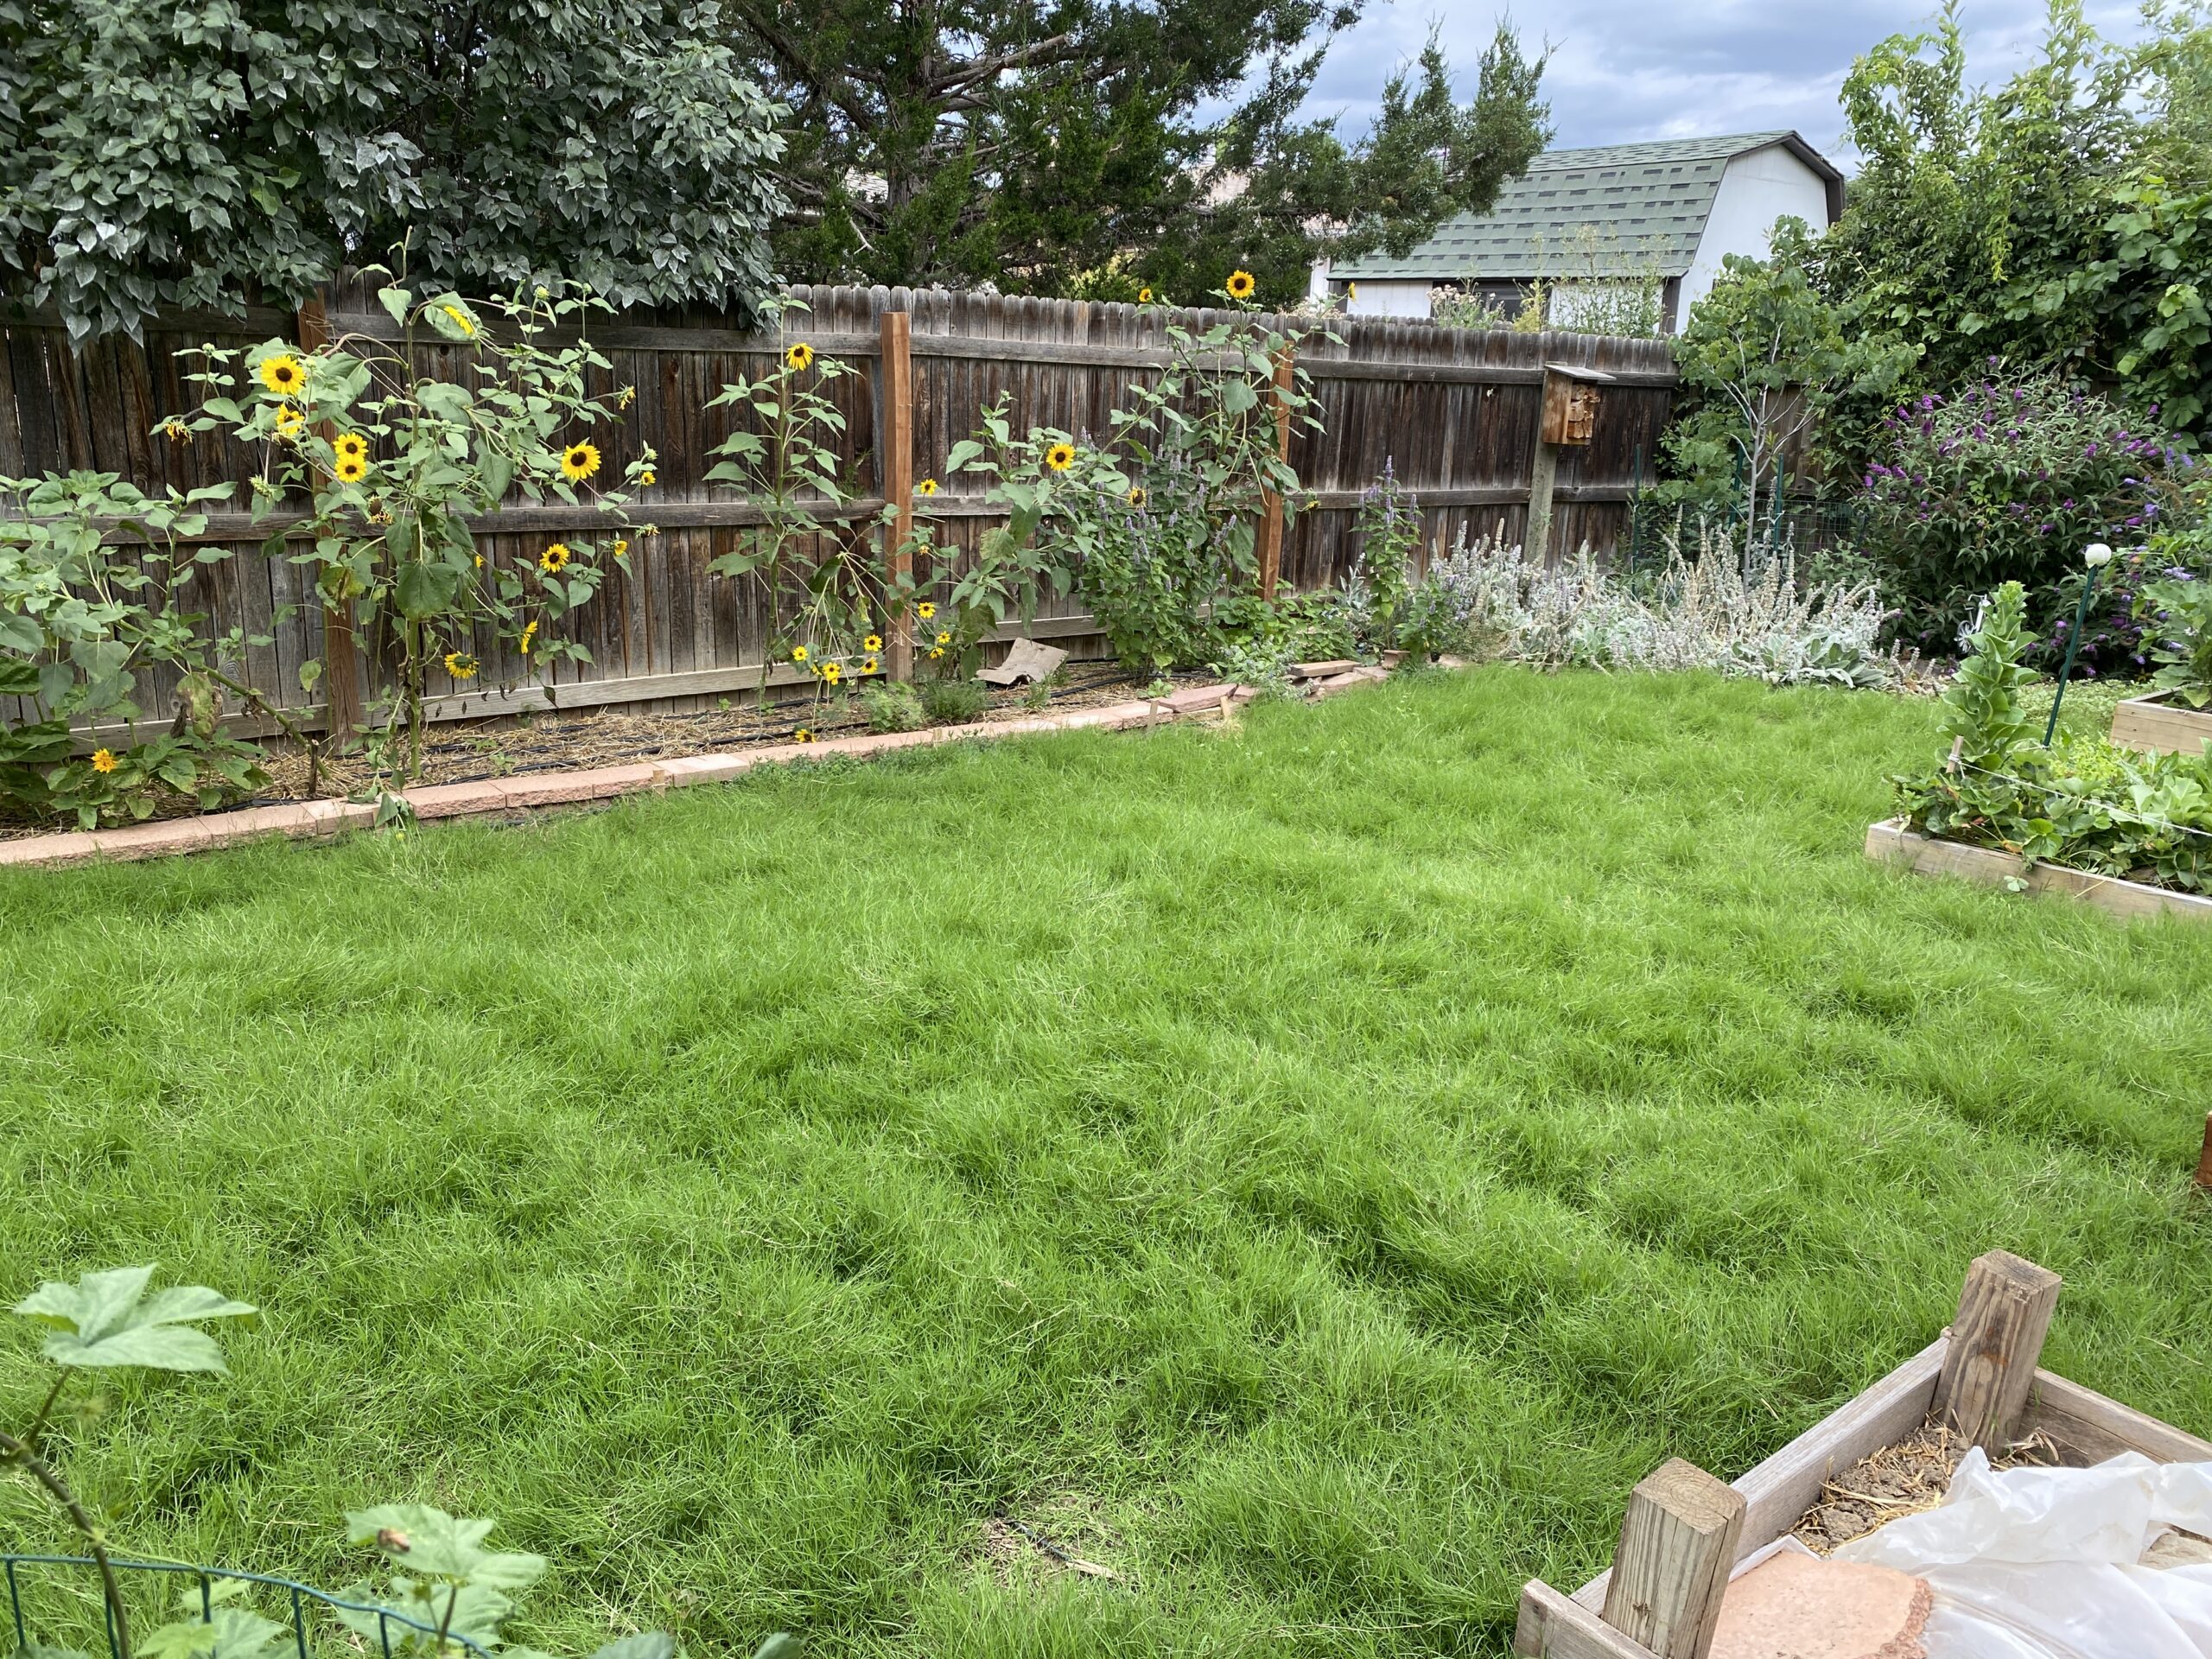
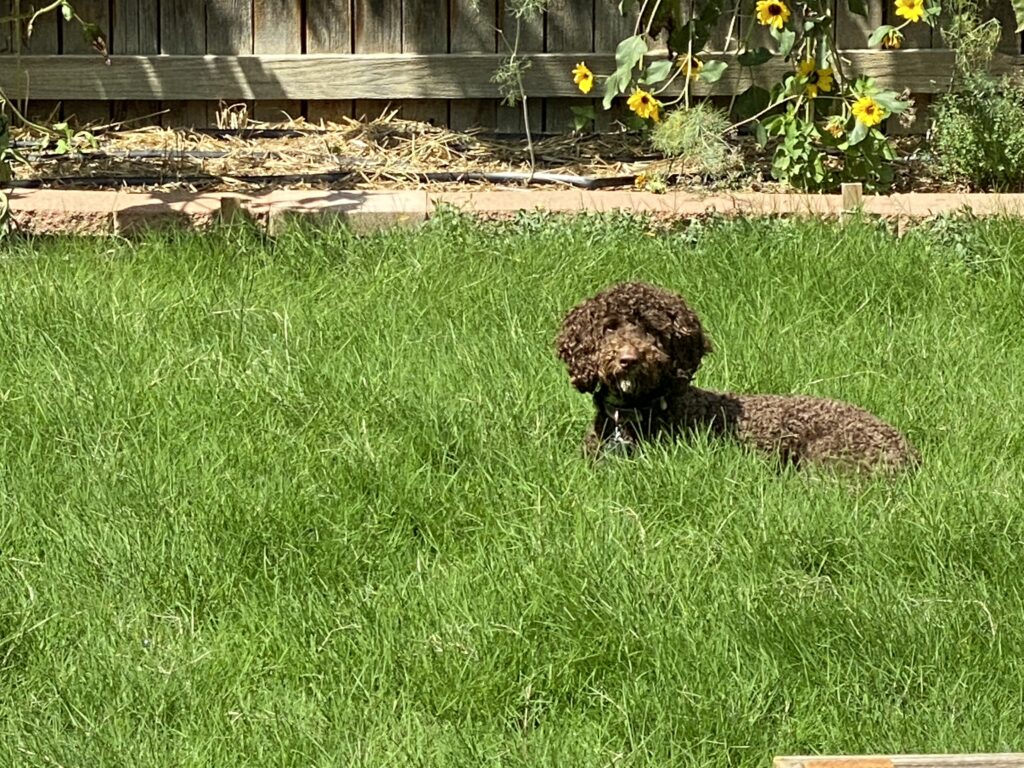
Flash forward to today: he found the perfect compromise: Dog Tuff Grass™. We now have the greenest and most drought-resistant lawn in the neighborhood. We’re both delighted.
Read on to learn more about the grass, install process, costs, and lessons learned.
Establishing Drought-Resistant, Dog Tuff Grass™ Lawns in Boulder County
This miracle grass is called “Dog Tuff Grass™.” It does not produce seeds, thrives in hot, dry climates, does not need to be mowed, and once established uses up to 90% less water than typical lawns. It’s also resistant to dog urine, and self-repairs if disturbed by rough play or digging.
It thrives in direct sun, is exceptionally vibrant green during the warmer months, and grows in charming, soft mounds. It makes me swoon. The grass can be cut short once established, but we prefer a more naturalized look.
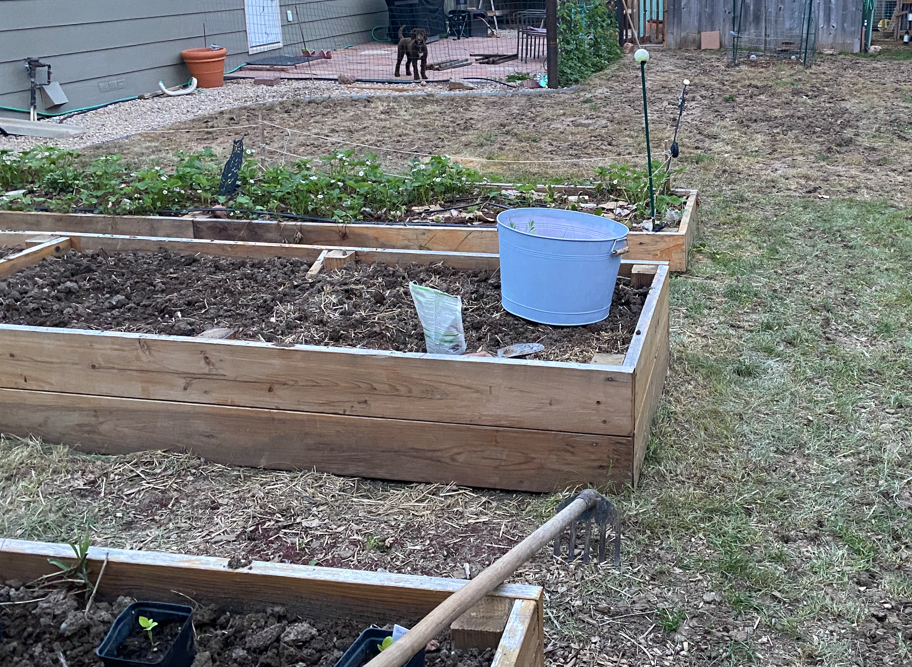
Installing this grass is unlike installing rolls of sod, or re-seeding areas that don’t germinate well. Dog Tuff Grass™ does not make seeds, so it needs to be transplanted into place. This means you have to plant each tiny plant individually, one per square foot. In our case, that meant planting about 650 glass plugs, each about the size of a veggie start from a 6-pack of veggies. We bought ours from High Country Gardens.
If you’ve not planted 650 plants before, allow me to elaborate: it’s a TON of work. It’s not for the feint of heart. We love planting and have experience with large landscaping projects so we labored through it, sometimes begrudgingly. I don’t recommend tackling a landscape-scale project without help unless you’ve done something similar before. I recommend that you are also the kind of person who enjoys spending your evenings listening to audiobooks while planting by headlamp if you go it alone.
STEP 1: Eliminate any existing lawn or plants.
Although we stopped watering the bluegrass in 2022, we had some struggling holdover turf that we wanted to remove before we could begin planting the Dog Tuff Grass™. We chose to kill the remaining bluegrass with a careful spot applications of glyphosate rather than cutting out the sod partly because of time and cost, but also because the dead old lawn would provide mulch to the new plants.** I also hoped, and was thankfully correct, that less disturbance to the soil and seed bed would discourage weeds. (Note: PlantSelect.org notes that many existing lawns can be converted to Dog Tuff Grass™ without eliminating the existing grass. We received different planting instructions with out shipment of plugs, but in retrospect, we probably could have skipped this first step altogether.)
I’m not comfortable using pre-emergent herbicides in my landscape, so we skipped that recommended step.
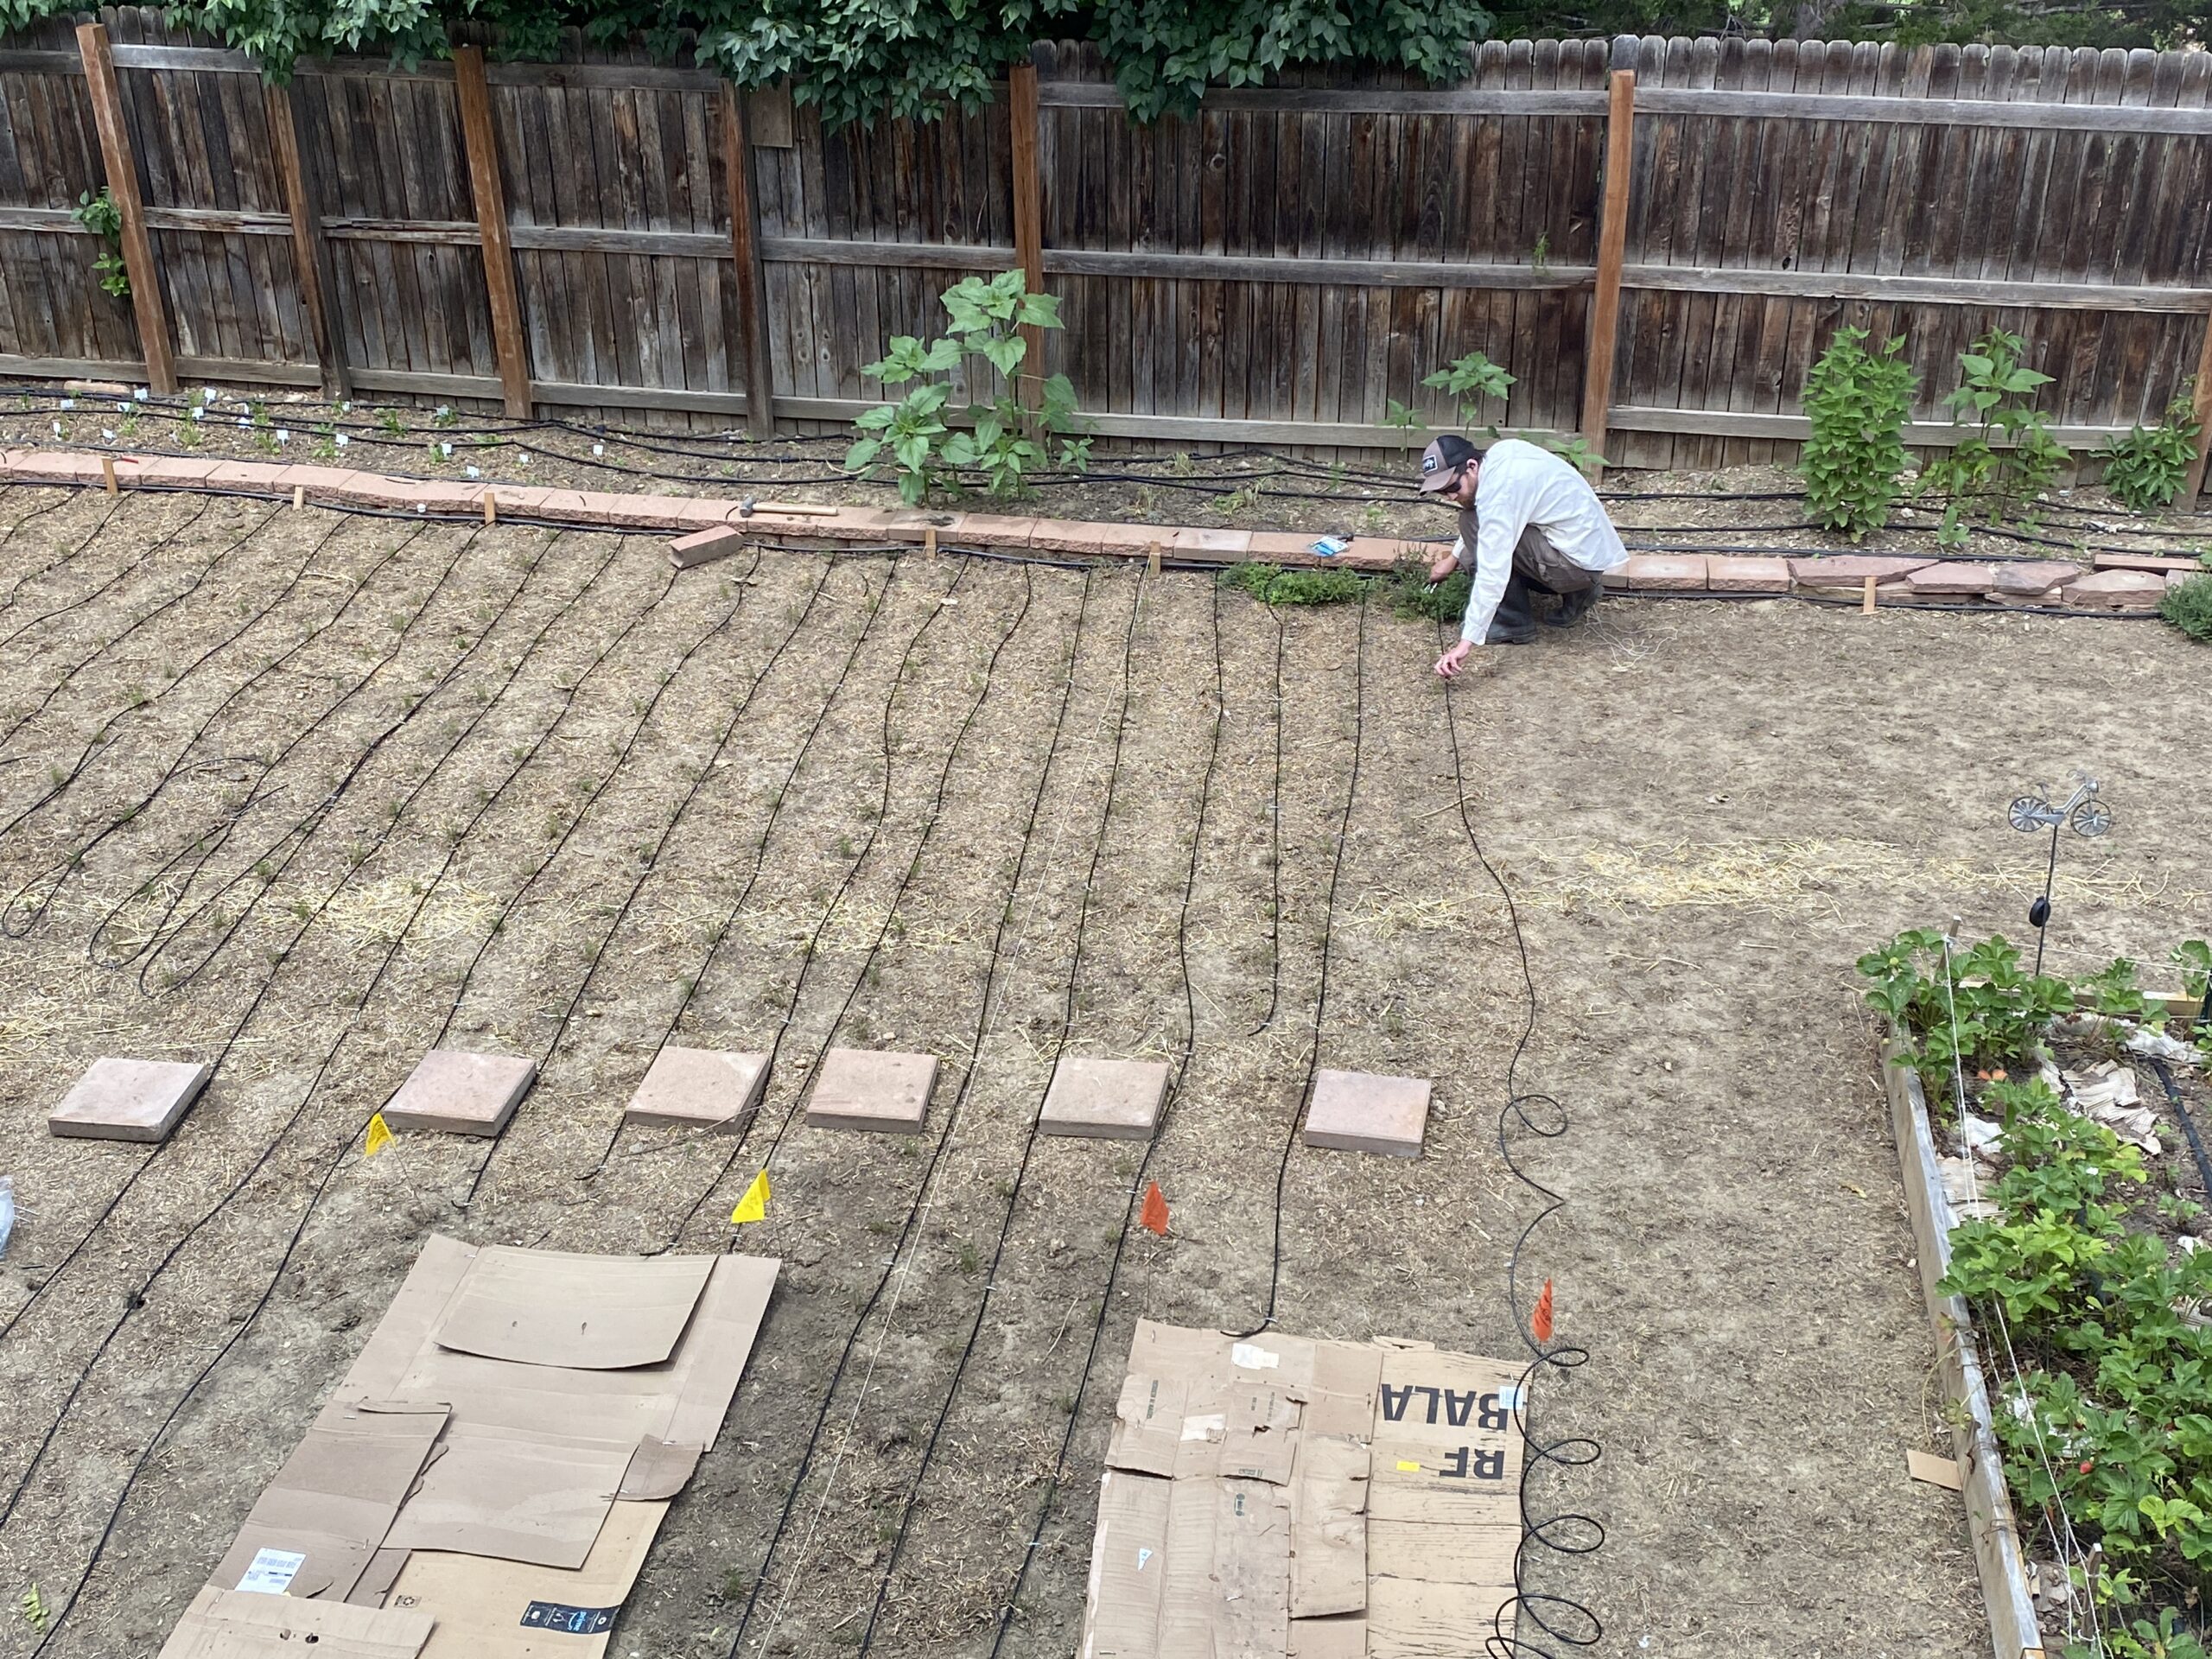
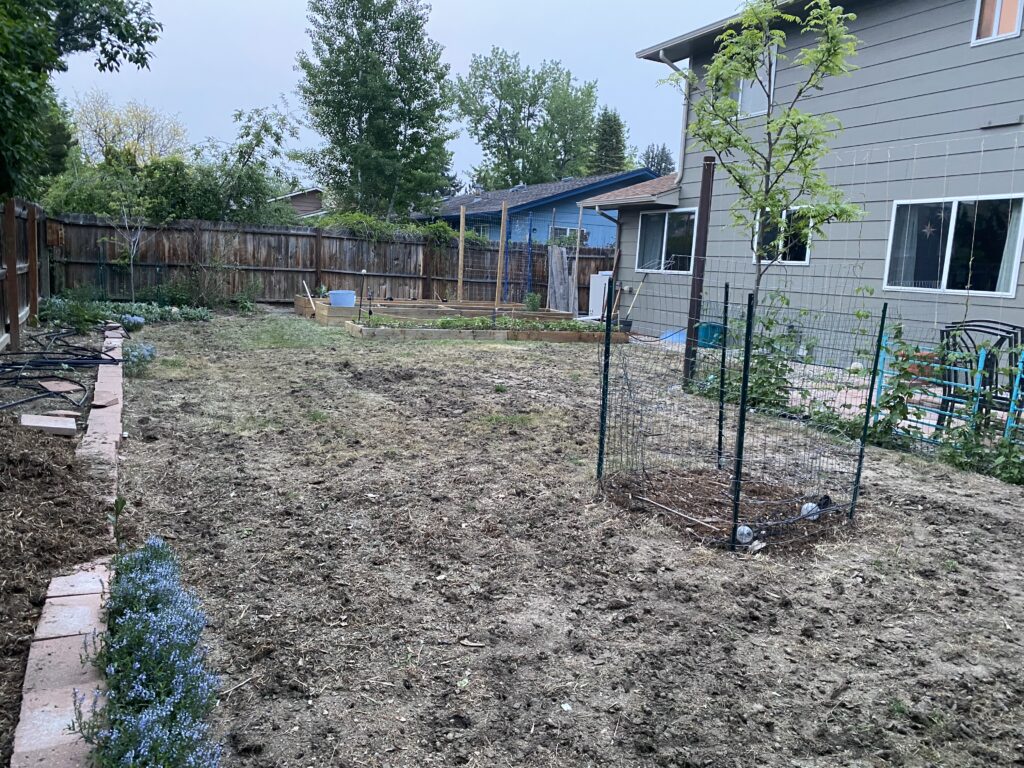
Once the old grass was dead (two+ weeks), we planted directly into the dead grass. The transformation starts out ugly, depressing even…as seen below.
STEP 2: Install drip irrigation.
Since we didn’t use pre-emergent herbicides, the kind that prevents new weeds from successfully germinating and taking root, we installed a ¼-inch micro drip irrigation system that emits water at one-foot intervals so we’d only be watering the precise plant we wanted to grow. We attached a ½-inch poly line to the hose bib (controlled with a timer) to deliver the water to the ¼-inch micro irrigation lines. The ¼-inch tubing has built-in emitters at one-foot intervals; that spacing guided our plant spacing.
Once the lawn is fully established in a year or two, we can pull the tubing up and re-use it in the garden beds or pollinator garden out front. We will water with a sprinkler in future years when the grass is fully rooted.
STEP 3: Planting…it takes a lot of time

Nurseries that sell Dog Tuff Grass™ plugs suggest you use a polymer called “Soil Moist” in the bottom of each grass plug hole. It’s a little bead of material that expands into a gooey marble-sized ball of moisture when exposed to water, and it’s supposed to keep your plants thriving between waterings when the plants are small. I can’t speak to how well it works since on top of watering the new plants it rained a lot in Spring 2023, so the soil never fully dried out.
Here’s what we learned using Soil Moist: when we followed the directions, our wee grass plugs would be pushed up and out of the soil when the beads hydrated. They would have died from desiccation had we left them in that state. We quickly modified our approach and installed the pre-hydrated polymer into the planting hole a couple of inches below each plug, and mixed it in with soil. On top of that mix we’d plant the grass plug, and pack in the native clay soil around it.
I told you this took a long time, right?
Can you skip the “Soil Moist” step? I’m not sure. Spring 2023 was so wet we could have, but in typical/ drought years I imagine it would have been immensely helpful.
STEP 4: Put up barriers
You need to keep critters, both two- and four-legged, off the grass while it takes root. We elected to keep our dog and daughter off the grass from the moment we applied herbicide, as seen above. I created a small gate near the greenhouse and a temporary fence from old wood to accomplish this. The temporary fence and gate were not pretty. I imagine our neighbors are not only happy to see green grass in our yard now, but also that the make-shift barriers have vacated the premises.
STEP 5: Watering and weeding to establish your drought-resistant Dog Tuff Grass™ Colorado lawn
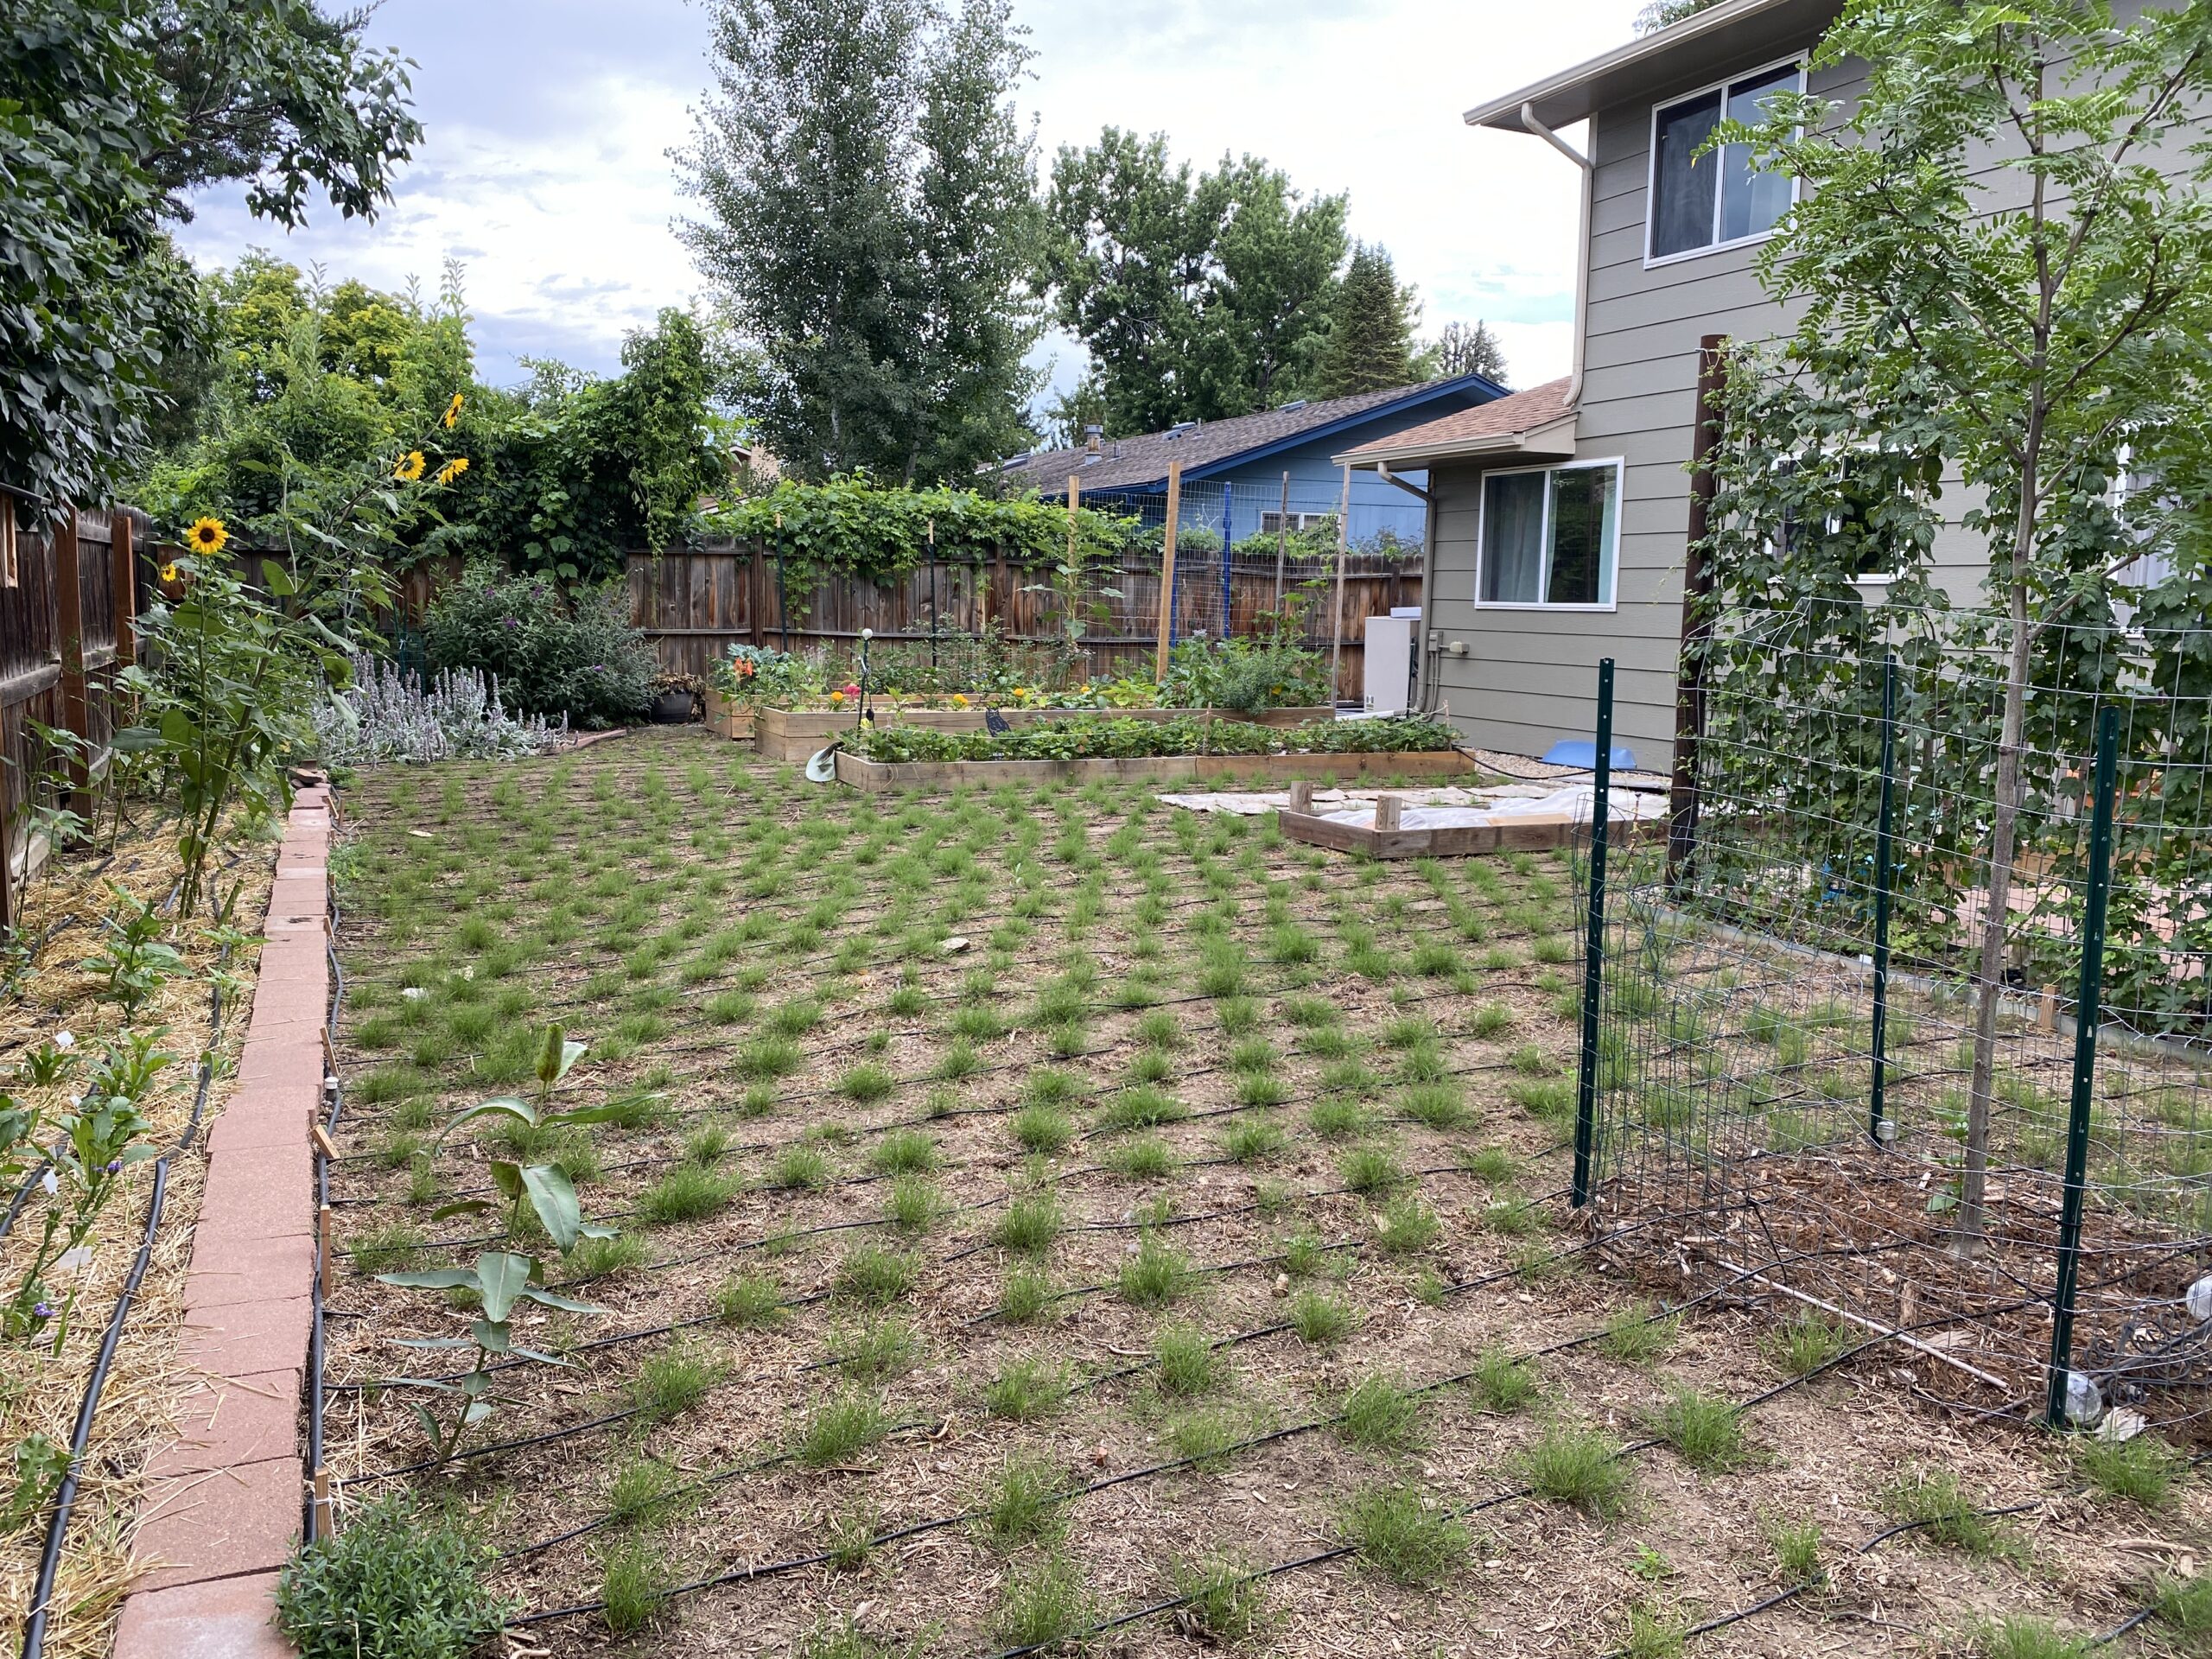
When establishing Dog Tuff Grass™ you need to water it a lot at first, then cut back to once a week after about a month of growth. In our case, we also needed to weed consistently between the young transplanted plugs to ensure the grass could out-compete any weeds. It only grows during the warm season (June-October), and thrives in heat, so the early-season growth is slow. While initial water use is higher than desired, in our experience it was still only half of what we would have used for Bluegrass, and will decrease over time.
We went camping for a few weeks in July/August, and the growth that occurred in our absence was staggering!
Water use, aesthetics, and our path forward
In total we spent about $1,000 on supplies, and spent a lot of time planting. However, to say we are delighted with the fruit of our labor is an understatement! The lawn filled in very well during the first growing season, though we will need to address a couple of bare spots. We didn’t plant between the raised garden beds until July, so it’s still catching up to earlier plantings.
The first July of watering the Dog Tuff Grass™ required 9,800 gallons. 9,800 is much higher than our summer base use of 5,500 gallon (use for household and gardens, but zero lawn). However, once the Dog Tuff Grass™ is established, peak summer water use should be about 6,500 gallons per month.
One lingering question for me is how invasive it might be. It’s not considered invasive since it does not produce seeds. However, its creeping habit and makes me a little concerned that that it may spread to my raised bed gardens . If that happens, I suspect many clients and friends will be happy to accept some Dog Tuff Grass™ transplants into their yards.
Feel free to reach out with any questions, or if you’d like to see the lawn in person!
*The prior owners rented the home back from us for two months after closing. Thus, we have a record of how much it took to maintain a lush lawn before our purchase.
**Herbicides, even organic ones, need to be used with extreme caution. They can harm more than their intended target, including the insects and animals who visit your home. Study and utilize best practices when applying any herbicide.
Epilogue: Is a Project Like This “Worth it?”
I’ve had so many questions about whether this project was “worth it” that I decided to address them here. Worth entails some subjectivity. What’s worthwhile to one person might not be to another.
For us, this project was absolutely worth it. We love the way it looks. We are not willing to use the quantities of water required to have the equivalent lush landscape of Kentucky Bluegrass. The new lawn is beautiful and aligns with how we believe resources should be used.
As for the amount of time and labor required to install it…yeah, it was worth it. Was it always fun? Nope! Did it take longer than I wanted it to? Yep! Did we quarrel and tiff a few times about it? Probably.
Here’s the thing: we all have an unknown quantity of time on this great planet. I don’t get a lot of satisfaction from watching shows (indeed, we have not owned a TV in decades). I do, however, get abundant joy from making things grow and experiencing the cycles of nature.
Without my time planting by headlamp, I never would’ve learned just how fast those zombie-sized earthworms can boogie when scared…for me that’s worth a lot of toil. For reference, the micro irrigation lines shown in the video below are 12 inches apart–that’s a fast worm!
As always, your “joy mileage” may vary ; )
Let's Chat!
Contact

Considering a Purchase?

time to Sell?


